There are many types of wafer and die and many different reasons to test them. Your concerns might be stress crack propagation, delamination or the effects of the crystalline structure on strength. This article elaborates on the subtle differences between several types of bend tests. To investigate these and many others the following standard tests can be helpful.
- 3 point bend test
- 4 point bend test
- Ball and ring bend test
- Ring and ring bend test
Predict failure
A common purpose of a materials strength test is to predict failure. To achieve this an understanding of the true load conditions and real failure modes is essential (True and Real, referring to what the product experiences in end use). As explained in our Science of Bond Testing, it is often not so simple. Whilst the failure mode is usually known or at least predicted, the true load condition may be partially or not at all understood.
When the true load condition is not known or in doubt, a prime objective of a test is to reproduce the “Failure Mode of Interest”. No matter how close we believe we are to the true load condition, if the test does not produce the failure mode we are interested in, what value does it have? On the other hand, any test that does produce the failure mode of interest is likely to be helpful.
When the true load is known it should be tried and will then produce the true failure mode. If this is not the failure mode expected either your expectation of the true load, failure mode or both is incorrect.
3 point bend test
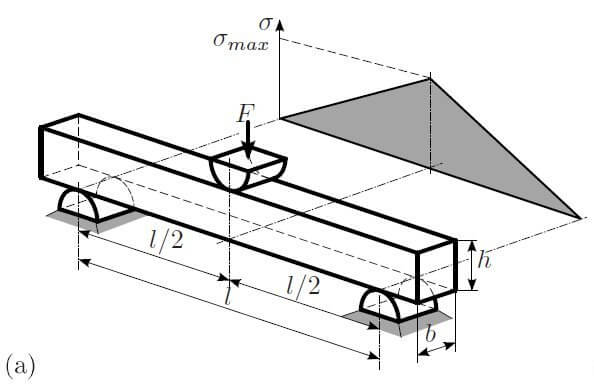
In this test the sample is subjected to the bending moment shown in the graph. It rises at a constant rate from zero at the two support points to a maximum where the load F is applied. It should be noted that the illustration is for a standard beam but the same applies when dimension b is much greater than dimension h, as is the case with a die or wafer.
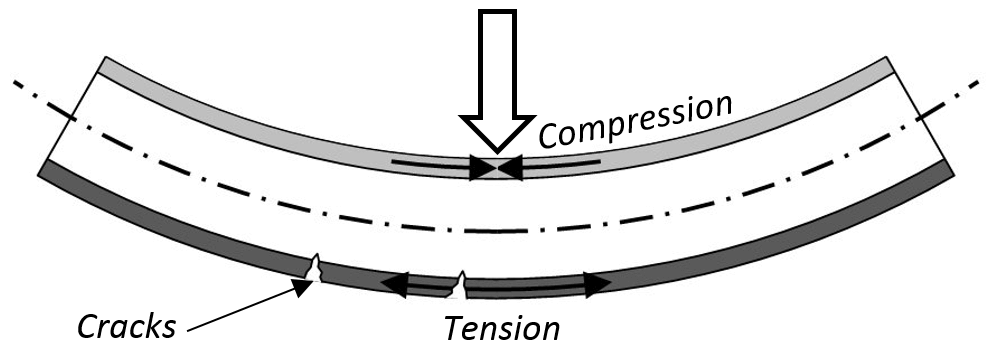
As seen in the illustrations, the bending moment produces tensile stress on the bottom and compressive stress on the top of the test piece. In the case of brittle materials and where crack propagation is a concern, failure is most likely to occur where tensile stress is applied. If one side of your samples is more likely to fail in tension it makes sense to test with this face on the opposite side to the load application F.
Due to Poisson’s ratio stress normal to the bending stresses and parallel to the axis of dimension b exists. They are about 30% (depending on the material) and the opposite of the bending stresses. At the ends of the test piece the bending moment and therefore all stress are zero. It will be seen that this is not the case in a ring test.
Bending moment and bending stress
The transition from compression to tension passing through thickness h results in shear stress also through the sample thickness. Where delamination is a concern this shear loads and thereby tests the strength of laminar layers and bonds. Where the layers of interest are close to the surface the relative expansion and contraction between the layers can be reversed by testing the sample face down or face up. The shear stress will be the same, only the relative expansion versus contraction seen by the layers is reversed. If the layer is in the middle of the thickness at h/2, the neutral axis, all stress is zero. This makes failure less likely but due to differences between the theoretical model and real world, for example non-symmetry, a bend test can still be useful.
The 3 point bend can be a single load application but the load can also be applied many times to test for fatigue and crack propagation.
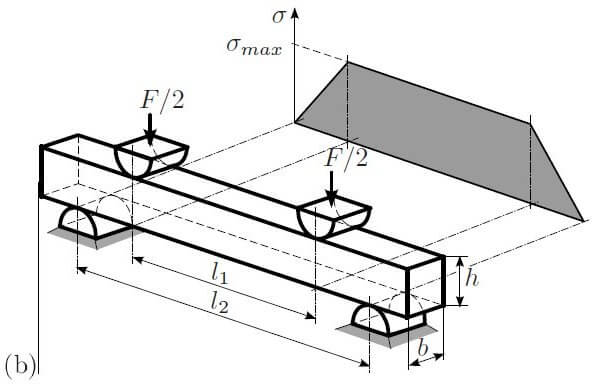
4 point bend test
Again the tensile stress is on the underside, there is shear within the thickness, there is no stress at the ends and the test can be done with one or multiple load applications.
Point of load application
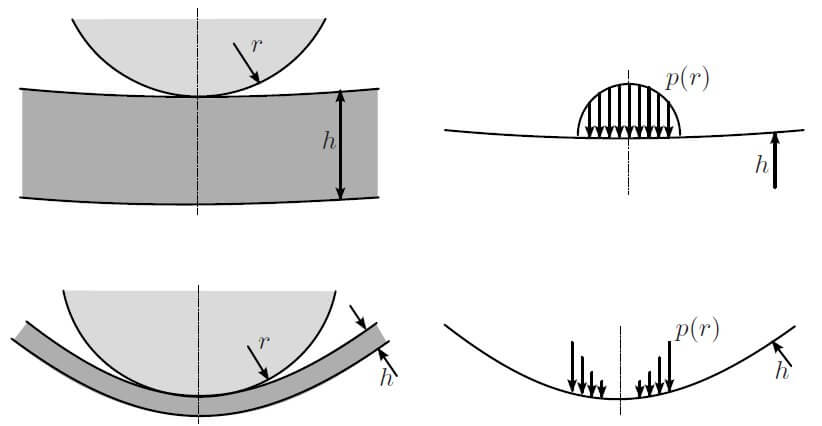
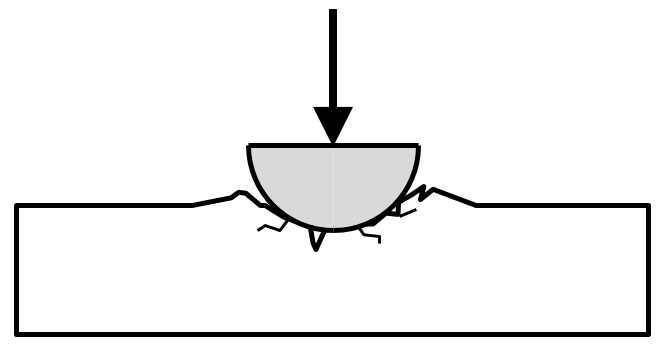
Alternatively, such points of local stress may be close to the true load or provide the failure mode of interest. In this case it is the point loading that can be achieved in a bend test that you are interested in and then a 3 point bend might be ideal. It does though still have the combination of the local stress and bending stress. If you are only interested in the local “crushing” stresses at a point or area load application it may be better to full support the test piece on a rigid and flat surface; this no longer being a bend test.
The stresses of localized loading can be modeled using Finite Element Analysis (FEA).
Ball and ring bend testing
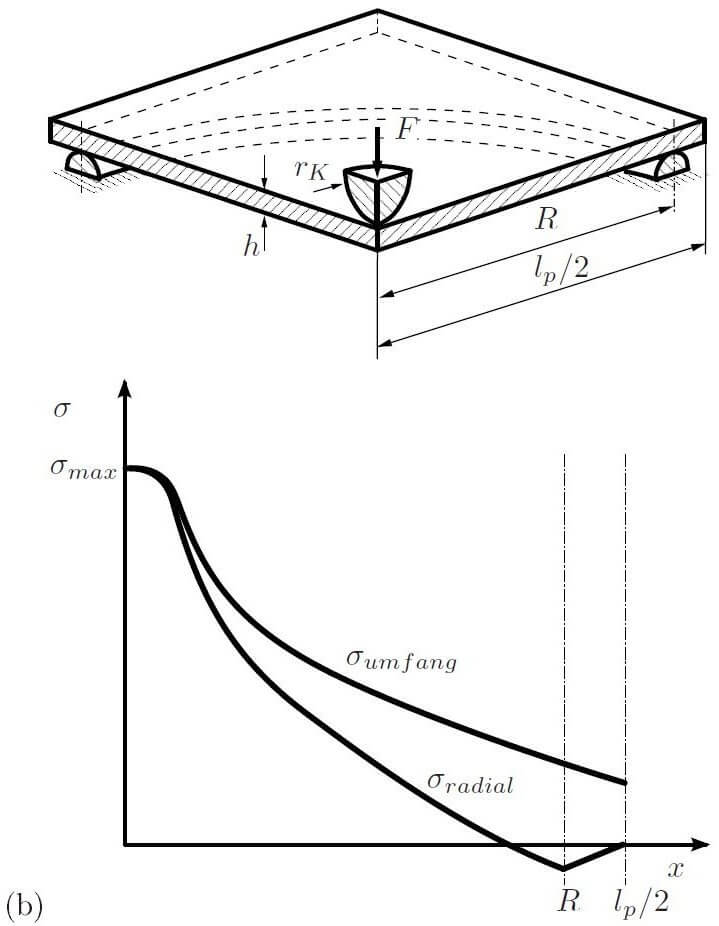
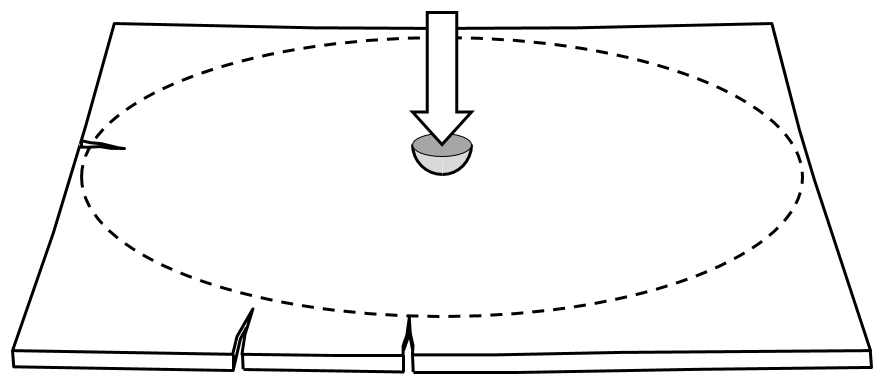
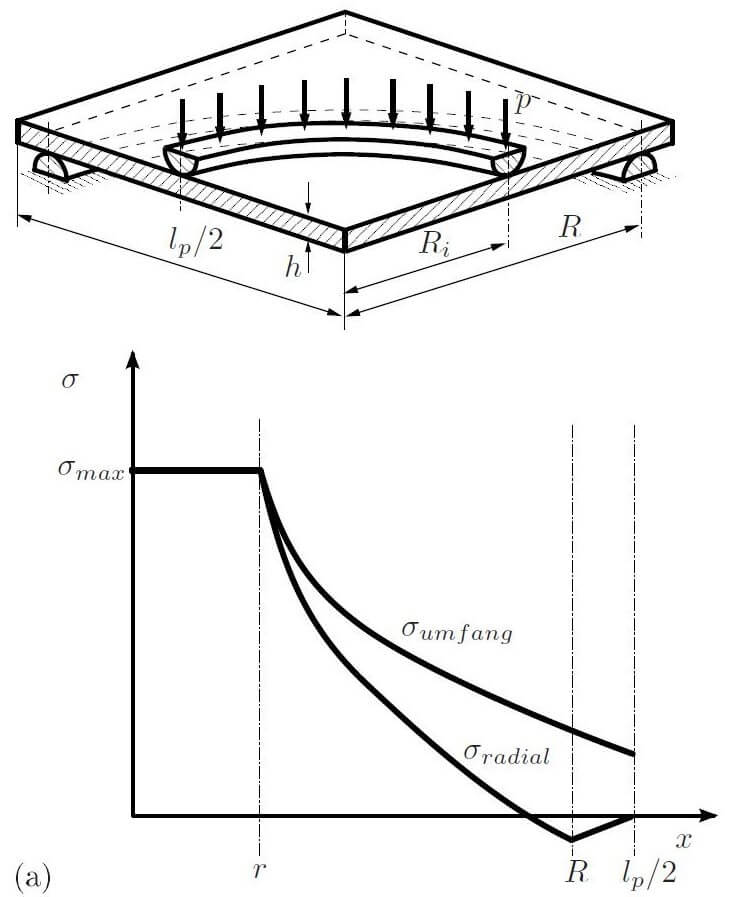
Similar to the 3 point bend test the maximum stress in a ball and ring test occurs where the load is applied. Again similar to the 3 point test the radial stresses are zero at the edges of the test piece but unlike the 3 point test there are the significant circumferential stresses at the edge. The presence of these stresses at the edge make it suitable to test things like the cracks, irregularities/stress raisers and residual manufacturing stresses that occur on the edges on the test piece. A typical example of such irregularities are the cracks caused during dicing.
Ring and ring bend testing
The similarities and differences between the ring and ball test compared to a 3 point bend test also occur between the ring and ring test and 4 point bend test. The ring and ring test produces circumferential tensile stress on the test piece edges and so can test edge effects in the same way. Similar to the 4 point bend test, within the smaller ring the bending moment stresses are constant but also include constant circumferential stress. As the ring and ring test better distributes the applied load, local stresses are reduced making it less likely to fail where the load is applied.
Visualize deformations
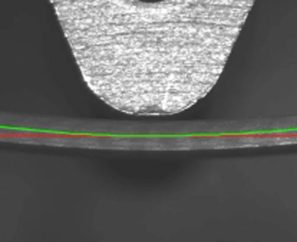
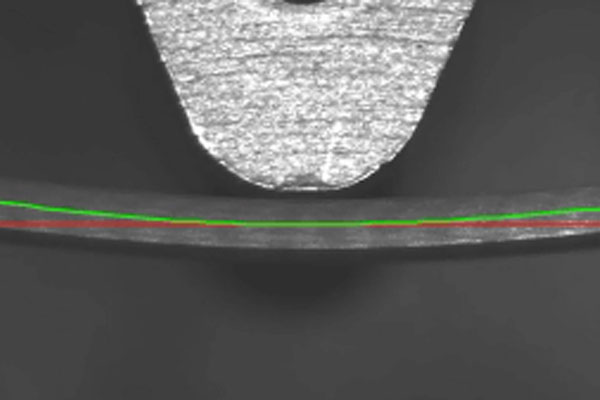
Using the Sigma you are capable of performing any type of bend test (click to view videos) and do extensive analyses of the measurement results. With a special camera mounted on the bondtester, one can visualize deformations during bend tests. Click here to read more about this functionality.
Fraunhofer Institute
The Fraunhofer Institute is a center of excellence for many of the technical aspects within our industry and with regards to these test can provide much more information on standards, test methods and result interpretation. They can be found at www.fraunhofer.de.
Put the Sigma to the test!
Xyztec is market leader in bond testing. We continue to develop solutions for all types of industries including solar, space, military, medical, automotive, interconnect and material science. Our customers include market leaders in all of these industries throughout the world. If you are interested in a live demonstration of the Sigma on your sample or perhaps for more bond testing inspiration, contact us today!
