SMD gull wing leads test
Various approaches possible and used in the industry:
- Tweezer test after cutting the package out
- Wire pull
- Vector pull
- Inclined work holder
Tweezer pull
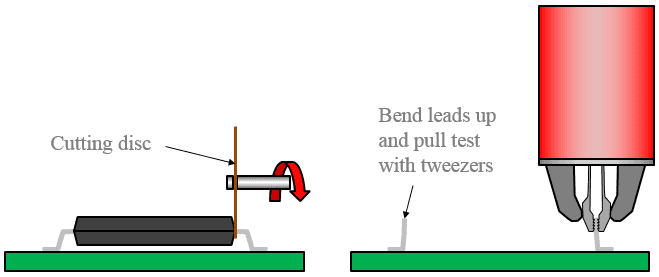
The best way to test the bond of an SMD gull wing lead is to cut the body from the leads and then test each lead with a tweezer pull sensor. This way, the bond is tested with no effects from the body and the other leads. The downside of this approach is the preparation time involved.
Wire pull
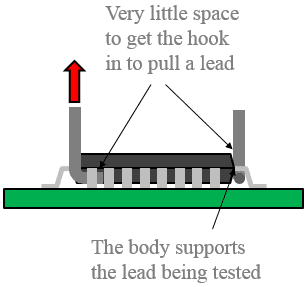
If you pull test without cutting the body off and use a hook there are 3 problems, namely:
- There is very little space to get the hook in to pull a lead.
- The body supports the lead being tested.
- When the hook is a tight fit under the lead, in the test method the sensor must not be nulled/zeroed before the test; it must be manually nulled before the alignment.
Because the hook is closer to the package than the pad, a lot of the test load goes into the package rather than the bond of interest. However, a weak lead to pad bond will still give a lower result and failure mode analysis of the tested bond will show poor soldering.
A strong wire hook is required. Xyztec can support you with extra strong hooks that will withstand relatively high forces.
Vector pull
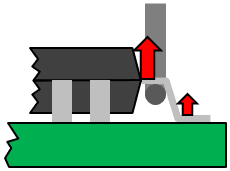
To minimize the effect the body has supporting the bond it may be better to use a vector pull, using a special hook and a shear sensor. This also allows the hook to be made stronger but it might still be weaker than the lead, depending on the clearance under the lead for the hook. With a vector pull, a higher test load is applied to the bond pad than with the regular wire pull.
Work holder inclined sample
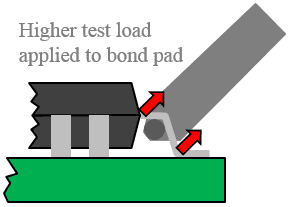
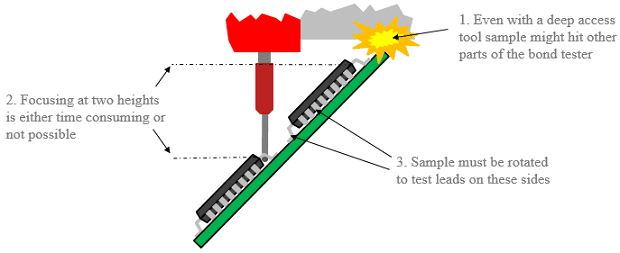
Another method is to incline the sample. Using this approach, one can still use a regular pull sensor in combination with a strong wire hook. This has the following limitations, though:
- It may not be possible with large samples because they hit the bond tester head or frame.
- The Sigma’s large work area does diminish this problem.
- Focusing a microscope at different test heights may not be possible or can reduce the number of tests per hour.
- The Sigma’s EZ microscope support helps to overcome this.
- Sample must be rotated to test all sides of the component.
- Handling and clamping an inclined sample can be difficult.
Test features
- Sensor accuracy ±0.075%
- Extra strong wire hooks available
- Deep access tooling