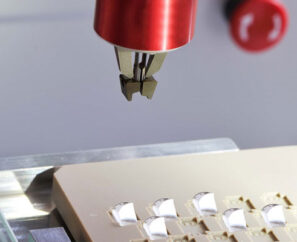
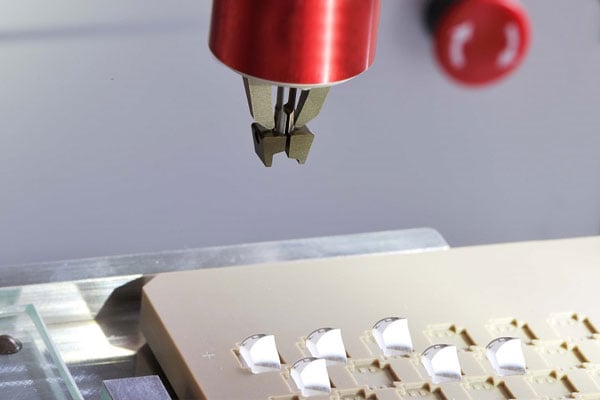
Measuring bond strength by pull testing is often the best way to get the failure mode in which you are interested. Additionally, and unlike a shear test, as the bond separates, the fracture surfaces are pulled away from each other, cleanly enabling accurate failure mode analysis. To pull a bond requires the substrate and interconnect to be gripped; because of size, shape and material properties, this can be difficult, particularly for the interconnection. In these cases, a set of accurately formed and aligned tweezer tips with precision control of their opening and closing is likely to make the difference between success and failure.
Alignment is most important
Preparation is the most important part of many things and this is certainly the case with tweezers pull testing. Preparation starts with “alignment,” here, the tweezer jaws are positioned to the sample. The next step is the “grip” where the jaws close onto the sample. Having completed the preparation we are then ready for the test. Although these two steps might sound simple, it will be shown that there is more to consider than might be immediately apparent. Typical of many activities, we tend to focus on the result, in this case the test, but preparation is where all the work is done and it is in this where success or failure is determined.
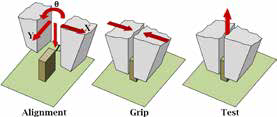
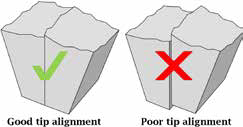
As previously noted, preparation is the “boring hard bit;” what we want is the result! But there is no getting away from it—we have to start at the beginning, in this case, alignment. Alignment occurs when the jaws are positioned toward the sample in readiness for the grip, but it also includes how the two jaws are aligned to each other. It is important that the tips and center lines of the jaws are in the same plane when they are open and as they close. For fine geometry applications this can mean only a few microns of misalignment will have detrimental effects. Before any of this can be done, we have to be able to see the sample and the jaws making illumination and magnification (when required) – an important part of the alignment setup.
Jaw openings
Different applications also require different amounts of jaw opening. In the case of fine pitch, the opening must be a small as possible so the jaws do not interfere with adjacent bonds or wires. Alternatively, the bond positioning within the sample may be less precise and a wide jaw opening will reduce the required alignment precision, and less precise alignment can mean more tests per minute. During alignment, the jaws are first positioned in the x, y and theta (rotation) axes. This is almost always done manually, but it would also be possible to make it automatic. Following this maneuver, there is the vertical or z-axis alignment, which can, again, be manual, but a programmable position relative to the substrate is often useful.
Ball pull
In ball pull applications, it is normally important to grip the ball as low as possible, keeping the jaw tips in contact with the substrate; this actually calls for a “landing force.” After initial alignment, and when the test is started, the jaws land onto the substrate with a programmable force. The jaws then close while the landing force is maintained, ensuring they remain in contact with the substrate, and therefore, as low as possible. Alternatively, the test may require the grip to be performed at a set height above the substrate. In this case, a light landing force is used to detect the substrate surface, followed by a programmable “step back” to the grip height measured from the sensed initial contact point.

Grip and tips design
Having set up and completed the alignment, we are now ready for the grip. It may be obvious that the design of the tips that grip the sample is important, but there is much more to it than this alone. Nevertheless, tip design is a good starting point and it is as varied as the samples they have to grip. As shown in the picture, there are four generic types: plain, serrated, hook, and cavity. These basic forms are then adapted to suit the application. There are three generic modes in the way the tips can close: increasing force, constant force, and closing distance. With increasing force, the grip force increases in proportion to the pull force, which may be considered optimum because the grip gets stronger to resist an increasing pull force.
It is ideal when gripping hard samples, but when the sample is soft, the closing force can squash the sample causing it to fail in the jaws rather than at the bond. In cases such as these, the constant closing force method performs better—it is very well suited to gripping soft samples. With hard samples, the friction between the jaws and the sample produces the pull force, and so, increasing the grip increases the friction in line with the pull force required. Soft samples need to be reformed by the jaws to produce a “mechanical lock” between them, and it is this “lock” that opposes the pull force. Examples of reforming are serrations “digging” into the sample, or a cavity reforming a ball into something like a mushroom shape. Reforming only requires a certain force—any more than this unnecessarily reduces the cross sectional area of the sample, reducing the maximum tensile load or pull force it can withstand, and thereby impart to the bond. As the load builds up though, the strain in the sample produces thinning, and this will relax the grip, thereby reducing the hold. It is therefore important that the grip force is held constant to maintain the required degree of interlocking between the jaws and the sample. To maintain this interlocking, the jaws must close as the test load builds up and the sample stretches. Another way of looking at this is, as the sample stretches, material flows out from between the jaws and they must continue to close through the test to compensate for this, maintaining the same grip. Some samples already have a feature under which jaws can hook and this is where constant closing force or a set closing distance can work well together with hook jaws.
Having optimized the alignment and grip on the sample, we are now ready to perform the pull test. As has already been said, this is now a simple task. There can be further complications, such as peel testing, that requires the movement of multiple axes, but in all cases, the sample is now pulled away from the substrate. Understanding the test result and failure mode is far from simple and requires a great deal of understanding, but this is not a topic we will venture into here.
Tweezers
Over the years, there have been many designs of tweezer tips and actuation methods that open and close them. Collectively, they cover all the requirements we have discussed with varying degrees of success and ease of use, but none of them include optimum provision for them all. It was with this intention xyztec developed its “USB” tweezer system. In addition to its many functions, the design had to be both small, so it would fit into limited space applications, and light, so as not to affect the test results.

All tweezers are mounted onto a pull sensor that measures the test force and incorporates the theta or rotational alignment axis. Like understanding the test result, the pull sensor is a topic in its own right, but here we are looking at the tweezers. Tweezer modules comprise two main elements: the jaws (tweezer tips), and the actuator that open and close them. To ensure precise alignment of the tips, the USB tweezers are like any set of hand tweezers in that the two halves that close onto each other are fixed together by a pair of spring arms. This design principle is proven to guide features in the jaws that can grip very small parts by maintaining the alignment of the jaws with the required accuracy as they close. At the top where the two arms meet, there is a quick release mounting spigot for precise installation into the actuator. One screw secures the jaws allowing an easy change over for different applications.
The actuator incorporates a miniature motor, gearbox and positional encoder that drive a lead screw and cam arrangement to open and close a pair of tweezer actuation arms. The actuator arms also include a strain gauge load cell that is calibrated to measure the force at the tweezer tips. Just above the jaw mounting point, a high-intensity adjustable LED provides close and local illumination of the sample at the test point. The pull sensor can also be used in reverse as a push sensor and when required, it is this pull sensor that is used to provide a landing force. All these elements enable the jaw tip distance, opening and closing speed, grip force, landing force and illumination to be under programmable control using real units such as mm/s and kgf that meet all of the test requirements previously discussed. The module can be fitted onto a 100g, 1kg or 10kg pull sensor, and its range of adjustments make it suitable for applications within these ranges of pull force.
Start testing
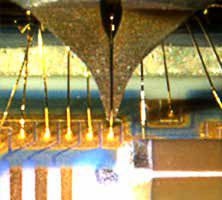
With the preparation done, we can start testing. The range of tweezer applications is too large to cover in its entirety, but we can look at a few of the more challenging and interesting examples. Gripping and pulling fine gold, copper or aluminium wire requires a precise opening position and constant closing force. Similar to a pair of pliers in miniature, jaws fitted with an integral diamond cutter positioned slightly above the tips of the jaws let the operator cut wire or ribbon so that only one bond can then be tested.
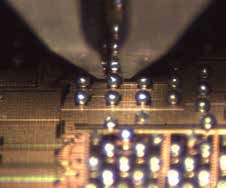
One of the most challenging tweezer tests is ball pull. This is often referred to as CBP which stands for cold ball pull or cold bump pull depending on any preference. The difficulty arises from the small geometries. Copper balls are relatively easy to test because they are quite hard and can withstand high grip forces without unacceptable deformation. Negligible, if any, reforming of the ball is required as the grip friction alone can be greater than the bond strength. Solder, and particularly gold, though, is more difficult and requires special cavities to be machined into the jaws to reform it, thereby allowing a suitable mechanical grip. To date, the limit on the ball size remains in the region of 50µm with the increase in volume of bumped wafers being a driving influence on continued development.

Tweezers are often used for peel tests. The example in above picture is of an aluminium bus bar being peeled from a solar cell wafer. This test has the added complication that the wafer substrate is extremely fragile. To be able to peel the bus bar from it without it breaking requires the special clamping fixture shown below the tweezers. Ribbon peel on flex, or very thin substrates, can present similar difficulties that again require intricate clamping and support. Alternatively, when the substrate is rigid, the test is typically less complex.
Established tweezer solutions exist for the majority of applications. As previously noted, the ability to grip ball interconnects as they continue to shrink is a likely requirement. Another possible development would be a fully automated test, and this would be possible with a modern bond tester fitted with a suitable tweezer actuator. One capability that has not seen as much exploration is a means of clearing the tested parts out of the jaws, which is a particular problem for soft interconnects that get lodged into the complex features that reform the part – ball pull being a good example of this.
Biography
Bob Sykes received an honors degree in Mechanical Engineering and is a Chartered Engineer; he is Chief Technical Officer at xyztec BV.
This article was first published in Chip Scale Review May June 2014.
